How to create an avatar and host it online
You will need to Install Microsoft V-Chat Suite if you haven't already.
There are three main areas that make up the Avatar Wizard, those are the "Avatar:", "Crop Tool:", and "Image Library:".
|
|
|
|---|---|
|
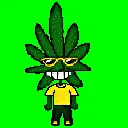
FRAME /BACKGROUND AVATAR |
STAND UP AVATAR |

The Avatar Wizard:
To load an avatar: Click "File", click "Open..." Locate the avatar (It will be in ".png" format.) and click "Open".To create a new avatar: Under the "File" menu, click "New".
To begin: Under the "Library" menu, click "Load Image". Locate the image you want to use. (Accepted file types are: *.bmp, *.eps, *.gif, *.jpg, *.jif, *.pcd, *.pct, *.png, *.psd, *.tga, *.tif, or *.wmf), and then click "Open".
The Avatar Wizard uses a pure green (RGB 0, 255, 0) background for avatars to be displayed on. This color is what V-Chat uses for transparency.
The area you will be dragging (or cutting and pasting) finalized images to is "Avatar:" There are 20 slots in total at 128x128 pixels in size each, representing all the different functions of the avatar.
To add an image: Drag and drop an image to "Avatar:" from either the "Crop Tool:" or "Image Library:" (They must be 128x128 to fit).
NOTE: You can drag images between panes of the Avatar Wizard. When you drag an image to a pane that already has an image in it, the new image replaces the old one.
To remove an image from "Avatar:", right-click the image you want to remove and click "Cut".
The "Avatar:" slots are explained here:
- Front: Forward facing slot. (not animated)
- Back: Backwards facing slot. (not animated)
- Idle 1+2: This animation plays occasionally.
- The first half of the Idle animation.
- The second half of the Idle animation.
- Happy: Animation plays when you click the "Smile" button.
- Sad: Animation plays when you click the "Sad" button.
- Angry: Animation plays when you click the "Angry" button.
- Shrug: Animation plays when you click the "Shrug" button.
- Wave A+B: Animation plays when you click the "Wave" button.
- This is the first half of the Wave animation.
- This is the second half of the Wave animation.
- Flirt A+B: Animation plays when you click the "Flirt" button.
- This is the first half of the Flirt animation.
- This is the second half of the Flirt animation.
- Silly 1 A+B: Animation plays when you click the "Silly" button. (randomly)
- This is the first half of the Silly 1 animation.
- This is the second half of the Silly 1 animation.
- Silly 2 A+B: Animation plays when you click the "Silly" button. (randomly)
- This is the first half of the Silly 2 animation.
- This is the second half of the Silly 2 animation.
- Silly 3 A+B: Animation plays when you click the "Silly" button. (randomly)
- This is the first half of the Silly 3 animation.
- This is the second half of the Silly 3 animation.
- Silly 4 A+B: Animation plays when you click the "Silly" button. (randomly)
- This is the first half of the Silly 4 animation.
- This is the second half of the Silly 4 animation.
Sections:
Crop Tool: This is for making modifications to images before dragging them to "Avatar:" or "Image Library:".The "Crop Tool:" has four different options. To move an image within the "Crop Tool:" Use the scroll bars to move the image vertically or horizontally or right-click and hold down while you drag the image within the "Crop Tool".
- Flip: To flip an image, right-click and use "Flip Vertical" or "Flip Horizontal"
- Vertical Flips the image vertically.
- Horizontal Flips the image Horizontally.
-
Invert colors: To invert the colors of an image right-click and use "Invert Colors".
NOTE: The green background color of your image will be inverted, and will be displayed as a pink square behind your avatar. This will show up in V-Chat as a pink background so you will need to change it back to green. - Mosaic: This option blurs an image, right-click and hover your mouse on "Mosaic", then choose an option: 2 Pixel blurs the image slightly, 5 Pixel blurs the image greatly.
- 2,3,4,5 Pixel Blurs the image in gradations.
- Magnify: To magnify an image, use the slider below the image to decrease or increase the magnification. Dragging the slider to the left makes the image smaller; dragging the slider to the right makes it larger.
- 0x,1x,2x,3x,4x Increases or decreases the magnification of the image
Image Library: The "Image Library:" is where you store images (64 maximum).
NOTE: All the images when loaded are displayed in the available panes in the "Image Library:". The images stay in the "Image Library:" until you remove them, even between sessions of the Avatar Wizard.
NOTE: All the images when loaded are displayed in the available panes in the "Image Library:". The images stay in the "Image Library:" until you remove them, even between sessions of the Avatar Wizard.
- To load a private avatar: under the "Library menu", click "Load Avatar". Click the "Files of Type:" drop-down arrow, and click Private Avatars. Locate the private avatar you want to use, and click "Open". Type the password for this private avatar, and click "OK". The images that make up the avatar are placed in the available panes in the "Image Library:".
- To add an image to the Image Library: right-click and use "Load Image..." Locate and select the image you want to use, and click "Open".
- To add several images from the same folder to the "Image Library:": Right-click and use Load Directory of Images... Locate the folder that contains the images you want, and click "OK".
- To load an avatar into the Image Library: right-click and use "Load Avatar..." Locate the avatar you want to use, and click "Open".
- To remove an image from the Image Library: right-click that image use "Cut"
- To remove all images from the Image Library: right-click and use "Clear"
Previewing an avatar: After you have finished creating your avatar, you can preview how your avatar will appear to others in V-Chat by using the "Preview Window". Do this before uploading your avatar to make sure the gestures are appropriate.
NOTE: You can leave the "Preview Window" open while you work in "Avatar:", and then preview your avatar as you work.
NOTE: You can leave the "Preview Window" open while you work in "Avatar:", and then preview your avatar as you work.
- To preview your avatar: click the "View" menu and click "Preview Window". Your avatar is initially displayed in the front, idle 1, or idle 2 positions. Although the background appears white, it will be transparent in V-Chat.
- Click the different gesture buttons to see how they look, or you can close the window.
Exporting an avatar as a private avatar: If you want to make sure that others cannot use your avatar, consider making it a private avatar by protecting it with a password.
NOTE: Avatar passwords are case-sensitive. Type your password carefully, and then remember it.
NOTE: Avatar passwords are case-sensitive. Type your password carefully, and then remember it.
- To export an avatar as a private avatar: click "File" menu, click "Export". In the File Name box, type a name for your avatar, choose a folder to export the avatar to, and then click "Save". Type a password for your private avatar, and click "OK".